Sometimes themes and editing tools just don’t do what you need to customize your WordPress site. Use your web browser to inspect the page and the item you’d like to change. Highlight the element, right click and inspect. The sources tab should show the code affecting the element. Say we want to change the color of the links on this website.

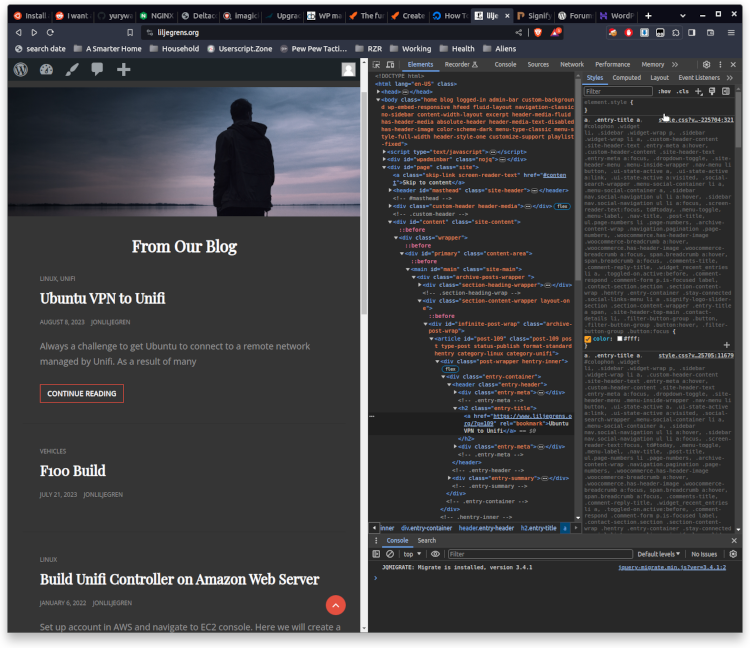
We’ll highlight a Link then right click and select Inspect. ( Chrome and it’s derivatives should have inspect. Almost all browsers have the built in ability to inspect pages. Same as F12 )
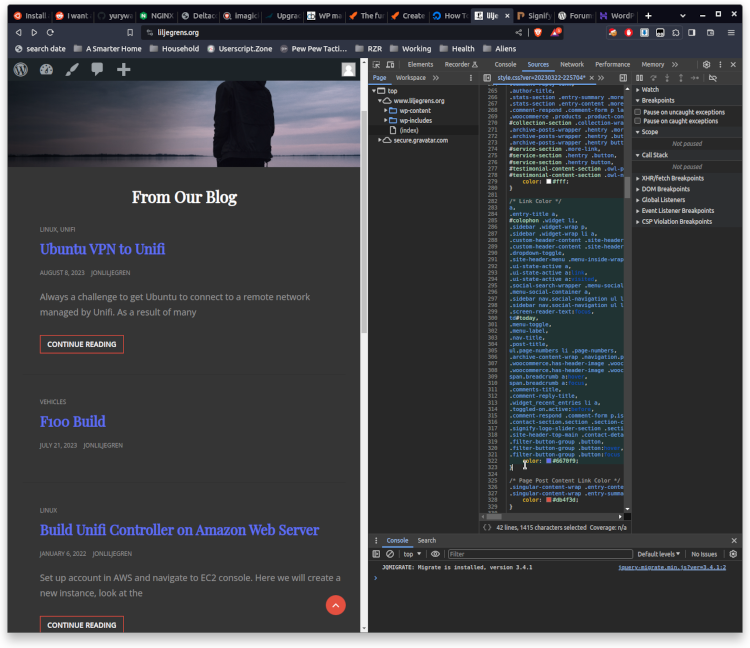
The tool will open and show you the workings behind the web page. Get yourself familiar with the layout and on the right notice the color: #fff; that is the box we want to change. Click the box and change the color. This will temporarily affect the web-page to verify the changes are what you desire. I’m going to change to #6670f9. There is a hyperlink at the beginning of the relevant code and will this will bring you to the source file. Click it and the main window will change to the “Sources” tab.

We need to copy the code to paste into our Custom CSS edits. I’ll select the whole bit of code from the leading /* Link Color */ to the closing }

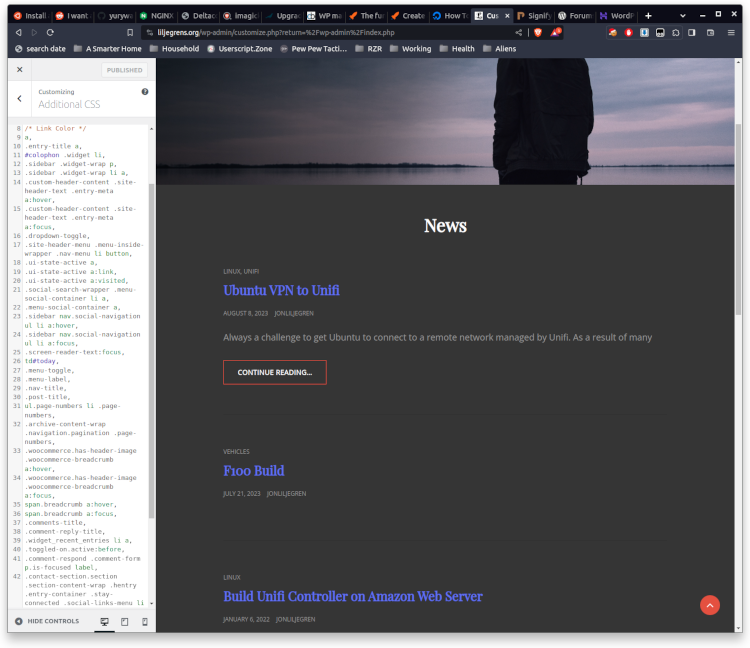
Next, I’ll login into WordPress and navigate to Appearance > Customize > Additional CSS. Paste your CSS code and modify the color value to your choosing. Hit publish and you’re golden. Notice the link colors are now blue since Published.

Next task would be to edit the code to change only one link’s color instead of the whole page!