Always a challenge to get Ubuntu to connect to a remote network managed by Unifi. As a result of many days of research we have found a secure and reliable method.
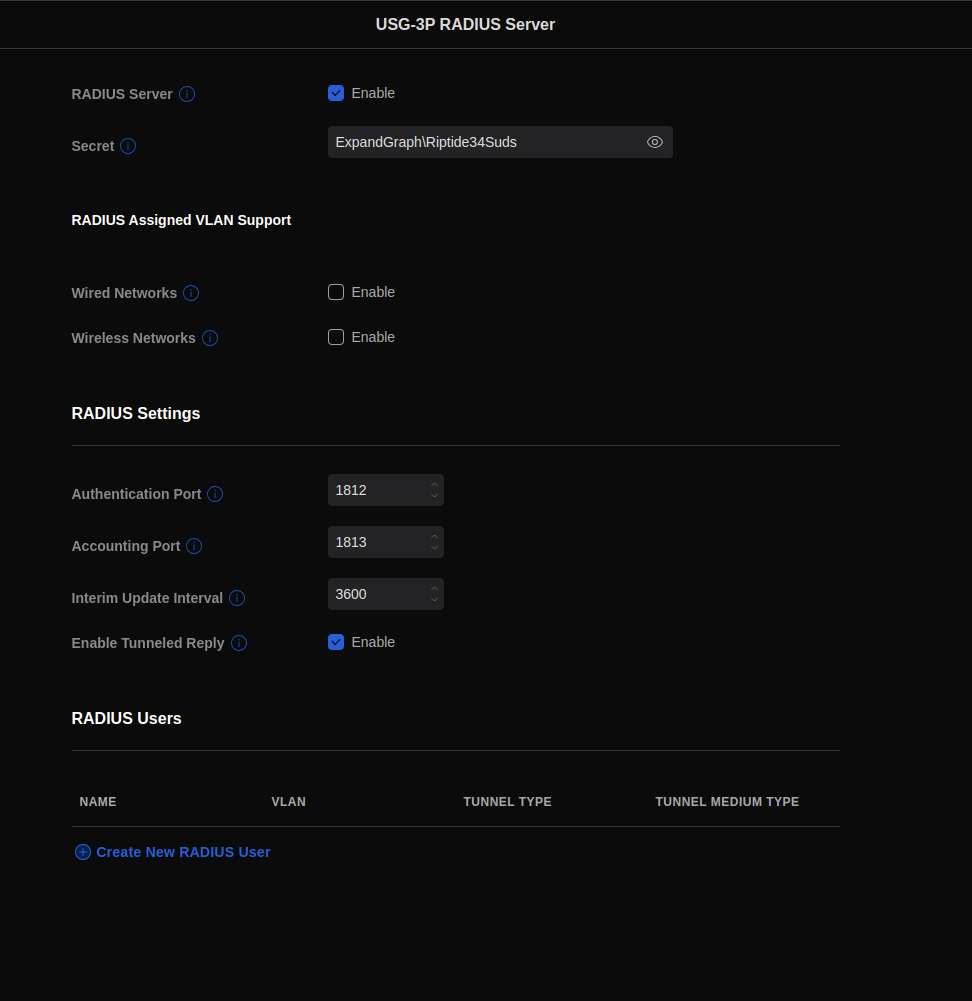
- Create a Radius Server in the Unifi console
- Navigate to Profiles -> Radius -> click on default
- Enable
- Create password
- This password is used internally between the Radius Server and the VPN Server
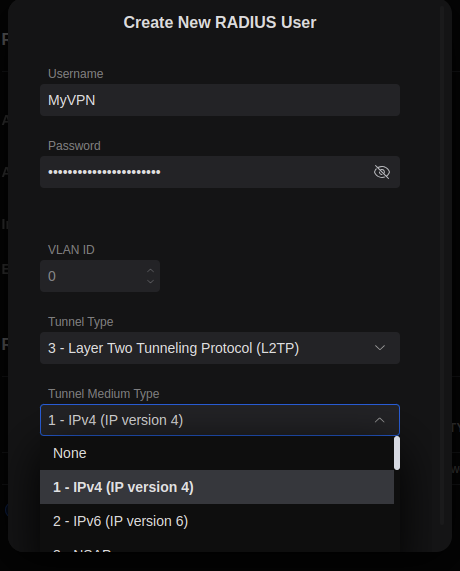
- Navigate to Profiles -> Radius -> click on default
- Radius User
- Create individual users for each person needing to connect and give them personal strong passwords
- Configure tunnel type as shown
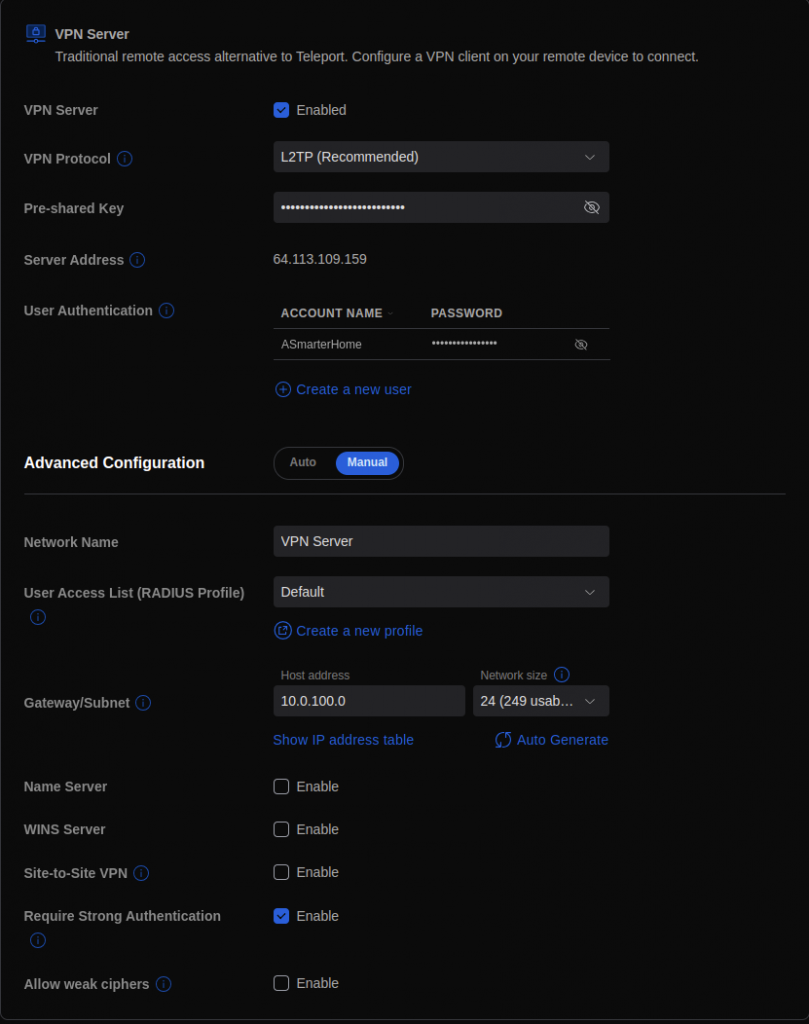
- Click over to VPN on sidebar
- Notice under User Authentication are the users created in previous step
- Enable
- Create Pre-Shared Key
- Super Secret Password
- This password is used by all VPN users
- Super Secret Password
- Take note of server address
- setting up DDNS is preferred
- Select Manual Configuration
- Set Host Address
- Our main network is 10.0.0.1 and we have vLans at 10.0.50.1/24 and 10.0.30.1/24 so we set the VPN network at 10.0.100.1/24
- Set Host Address
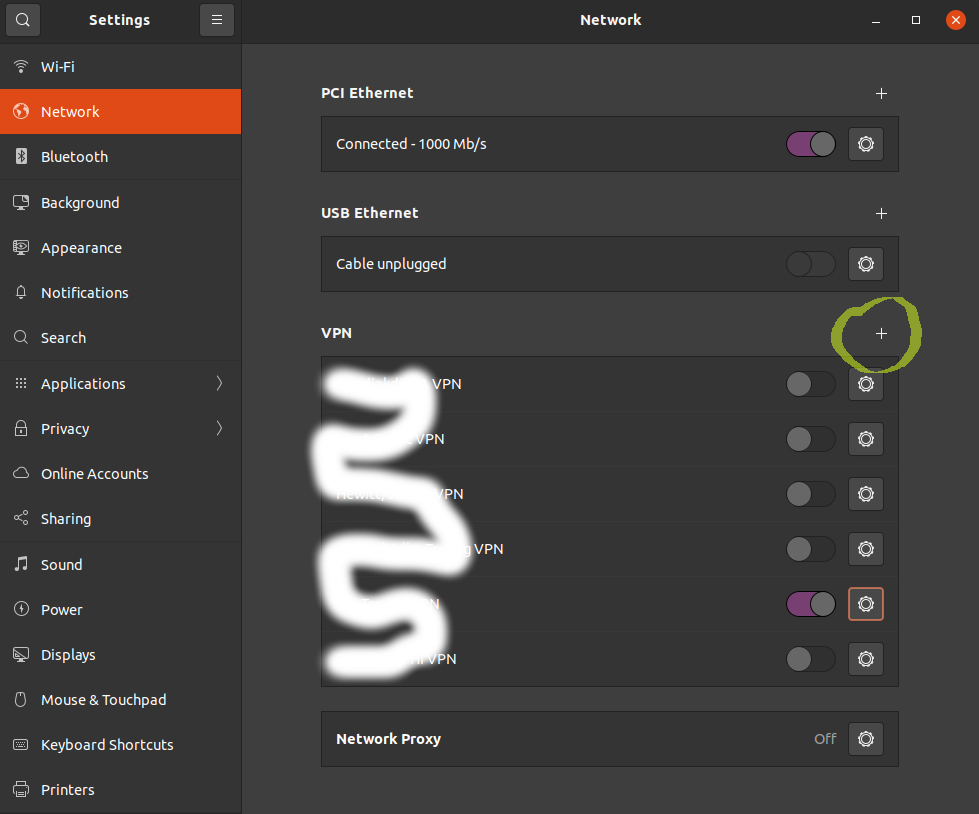
- Open network in Ubuntu
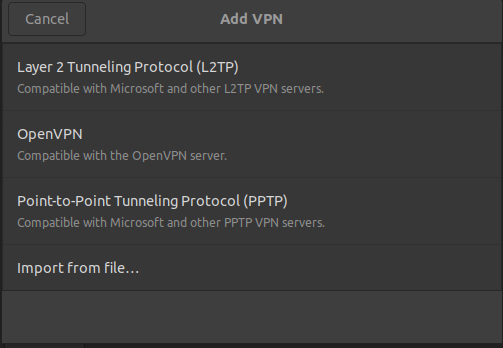
- Add VPN
- Select Layer 2 Tunneling Protocol
- Fill in Name, User Name and Password
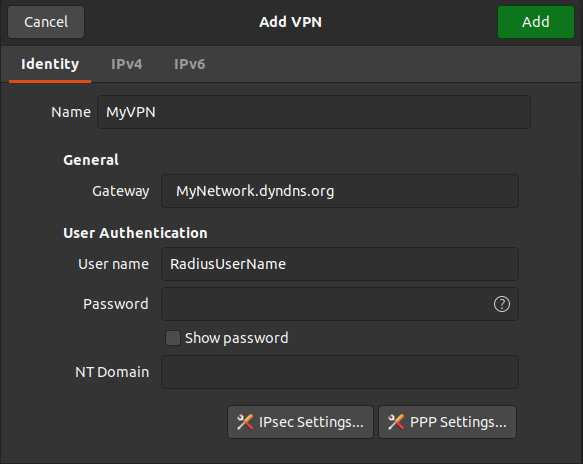
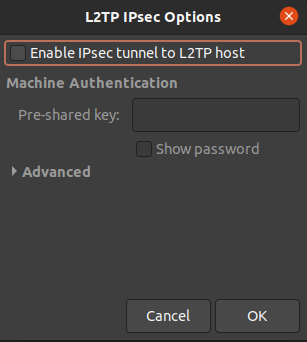
- Click IPsec Settings and insert Pre-Shared Key
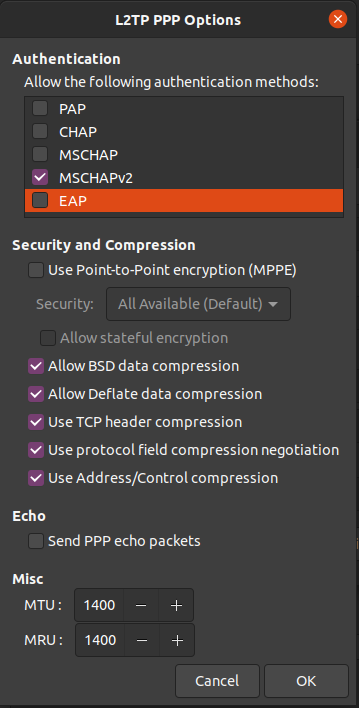
- Click PPP Settings and disable authentication methods except for MSCHAPv2
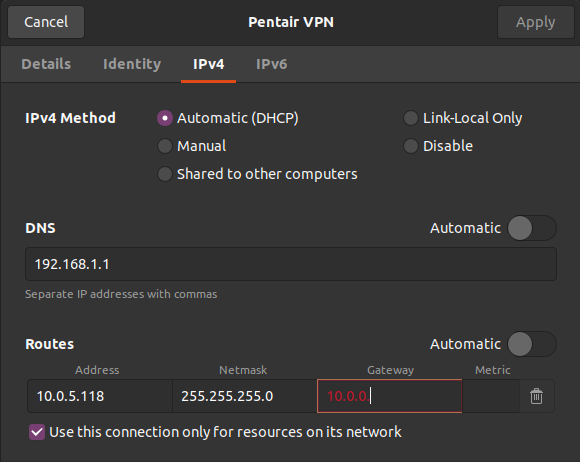
- Move to the IPv4 tab
- Set DNS to the address of the local router
- Set Routes to the address on the remote network of the devices you need to connect to
- Our Gateway will be 10.0.0.1
- Check “Use this connection only for resources on its network
- Connect to VPN through Network Manager and enter your personal password.
- You may need to add entries into the firewall in the remote network to allow your VPN network (10.0.100.1/24) into vLans.